The scarf is moving on quite well. I am getting to the end of my first ball of yarn so hopefully I will be able to see if the 4 I have purchased will do the job.
I want the scarf to be reasonably long, maybe between 4 & 5' I guess I'll just keep going until I've used up my yarn :)
I haven't decided what to do with the ends yet. I'm not sure if I should just leave them plain, add a crochet edging or maybe some tassels .... decisions decisions

Friday, December 18, 2009
Thursday, December 17, 2009
Crochet Cable Scarf
I think the scarf fairy has been into our house, somehow I seem to have lost most of my scarfs ... on the positive side its an excuse for me to crochet myself one.


I saw this Patons Shadow Tweed yarn and decided that it was just the thing to make my scarf with. Its a chunky Content: 56% wool, 50% acrylic, 4% viscose yarn.

I always like things in odd numbers so I wanted 3 cables across the scarf. I started out with 32 stitches using 6mm hook and front post raised stitches (much like the picture above) either side of the cables.
This was making quite a stiff scarf and I wasn't so keen on the look as it progressed.
So I started again, now I am working over 28 stitches using an 8mm hook. I am making a front post stitch at each edge with 3 cables across and 3 single crochet between each. The 8mm hook is making the scarf much softer and the reduction in FP stiches has simplified the design.
Work continues ....
Monday, December 14, 2009
Iridescent Irish Rose Brooch
I had some DMC iridescent light effects thread and I thought that it would make a really pretty brooch.
The thread is pretty difficult to work with as it tends to split into the individual threads, it means that quite frequently I had to go back and rework stitches when the thread split and the work got "loopy".
The thread itself is quite tough, so its hard on your hands to work it. I had to bandage my fingers to complete this one!
The central bobble is made with DMC metalic thread.
Friday, December 11, 2009
Newborn Baby booties
I have just put one of my patterns up onto Ravelry, its a free download of a newborn baby booties pattern.

Its also available through my website Walnut Baby in the downloads section.
Being for a newborn they are really quick to make up, there is no stitching required - the joy of crochet in the round :)

Its also available through my website Walnut Baby in the downloads section.
Being for a newborn they are really quick to make up, there is no stitching required - the joy of crochet in the round :)
Thursday, December 10, 2009
Bullion stitch earrings

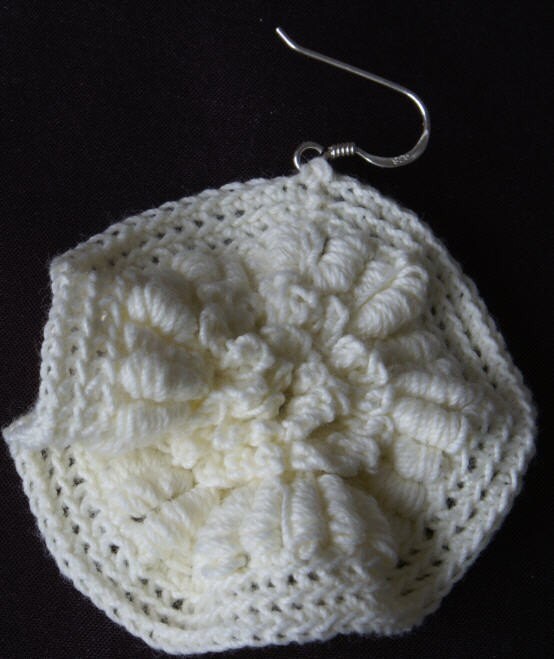
The centre of the earrings is made with a series of little picot stitches making a nice "fluffy" center.
Wednesday, December 9, 2009
Irish Crochet flowers
After my lack of success with the little floweret I thought I'd give some other irish crochet flowers a try. I'm never one to give up.
I created five different flowers ranging in size and complexity.
I am most pleased with the central flower although they all turned out quite well. Again getting the depth of padding cord right seems to be critical. When using coloured threads this can be more of a challenge, with white thread it is readily available in multiple thicknesses, however trying to match coloured threads is practically impossible. In the case above, and indeed with all my coloured pieces, I have to create the padding cord by using multiple strands of the working thread.
When working with the multiple strands it gets quite fiddly and you have to be even more careful of the padding cord bunching up and creating lumps in your work.
Thursday, November 12, 2009
It beat me!
I managed to finish my little floweret last night ... its not good! I'll probably get round to taking a picture but in the end my padding cord wasn't thick enough ... the finished floweret didn't have enough depth & the very find thread means that the twist is barely visible.
I think I will have to try again with thicker thread & a more padded padding cord, maybe 4 strands rather than 2.
I think I will have to try again with thicker thread & a more padded padding cord, maybe 4 strands rather than 2.
Wednesday, November 11, 2009
irish crochet twist - the progress is slow
Sadly the progress with my irish crochet twist is slow, I am using no80 thread and a 0.5mm hook .... unfortunately I have suffered a crochet related injury by stabbing myself in the finger with my hook.
Needless to say the project got thrown in disgust following this incident.
I aim to continue with the project when I get home from work this evening - with suitable protection this time :)
Needless to say the project got thrown in disgust following this incident.
I aim to continue with the project when I get home from work this evening - with suitable protection this time :)
Tuesday, November 10, 2009
Irish Crochet Twist - Complicated!!

I am attempting to crochet this "floweret" that comes from a very old DMC crochet book. I wanted to try to create the loop motif & thought that this was a fairly simple example to start with.
Well the complication comes with the way the pattern is written. Here is a section of the pattern as an example.
Make a ring with the cord foundation and crochet 15 plain stitches on this ring continue over the cord foundation and make 1 plain stitch on the stitch of the ring on wiich the plain stitch that preceeds the little ring is set.
It took me to read this quite a few times to try to understand it ... I'm not 100% sure that I do even now, but I am trying to create my floweret regardless ... Once I have finished one I'll post a picture & you can let me know what you think .. did I get it or not!
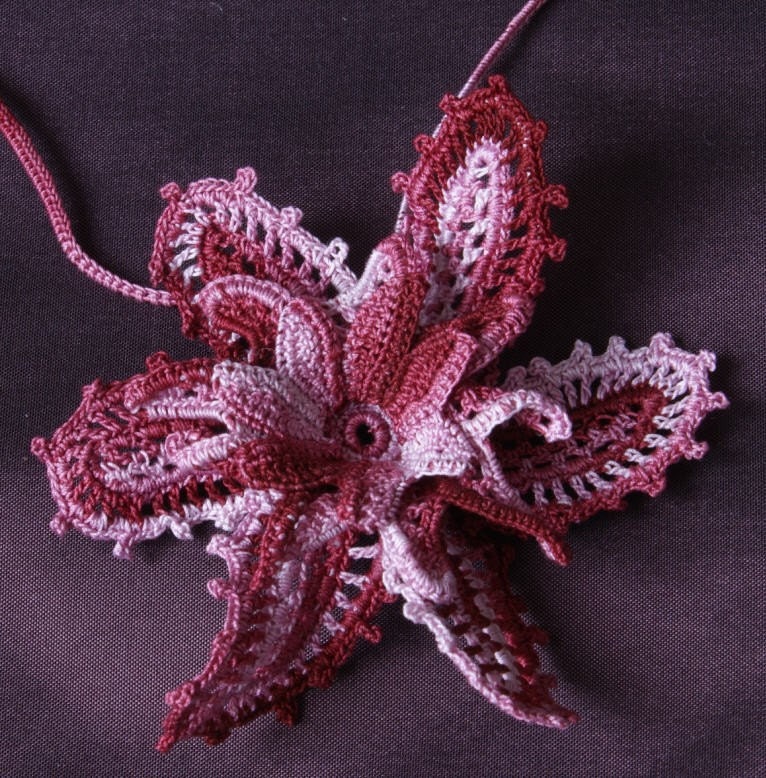
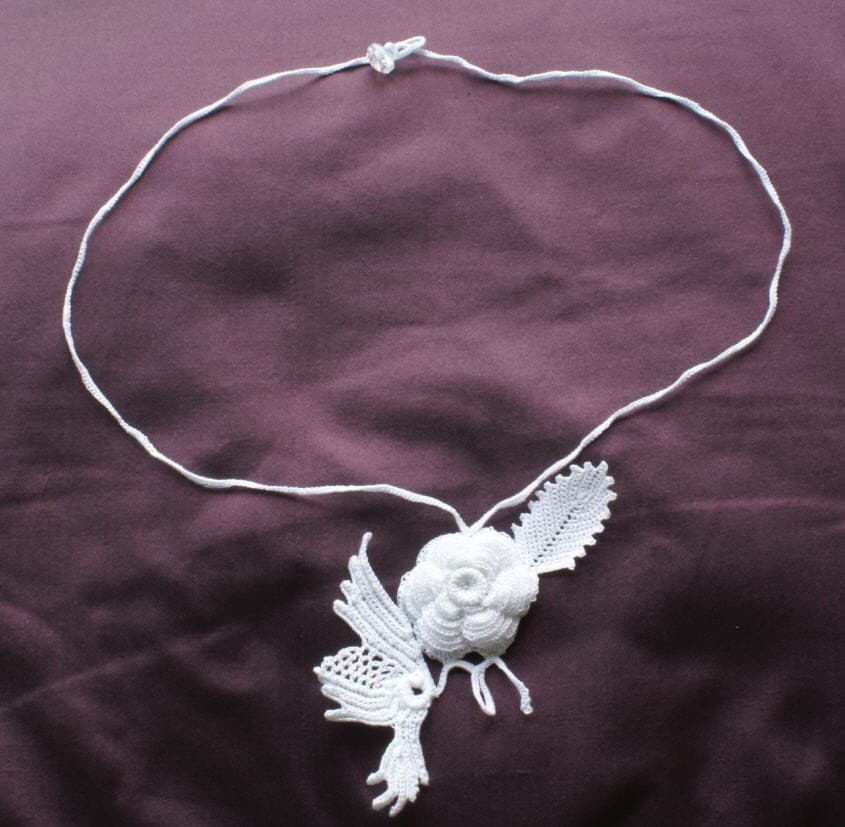
Irish Crochet Necklace - Old Rose & passion flower
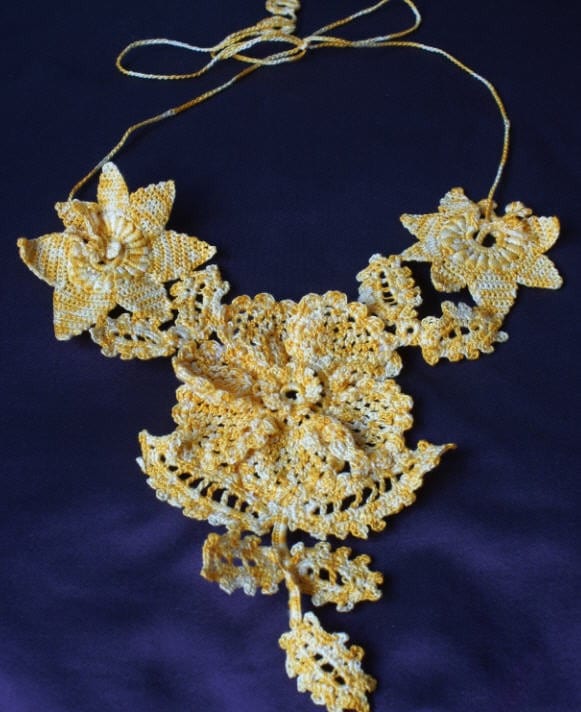
I started by creating the passion flowers, really I wanted the challenge of creating the roll (or Bullion) stitches & the clones knots that are required for the center & the pistils.

They are quite tricky stitches and more so when using fine thread. This particular necklace is created with No 30 crochet cotton, so not the finest my any means - but fine enough !
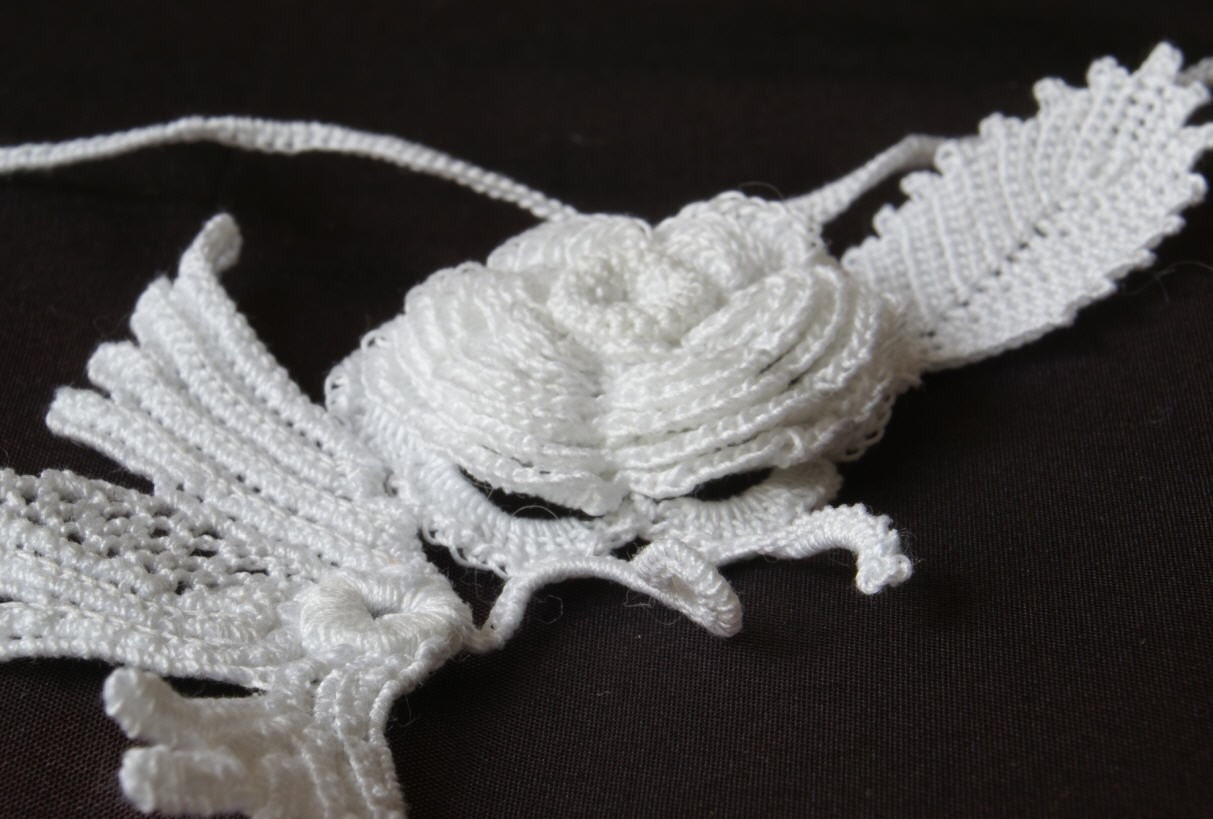
I decided to create an Old rose this time rather than the more traditional Irish rose

It love the lacy petals, I think it creates a beautiful and delicate centre for this piece.
I finished off with a sprig of open work leaves & joined the flowers with little double leaf motifs.
The chain of the necklace is quite plain, but given the complexity of the motifs I thought that this was best.
This necklace has a tie closure so that the wearer can adjust the length to fit. When using a tie closer I like to add little crochet covered washers to the end of the chains - this adds a little weight to make the ends hang nicely, otherwise they are prone to curling up.
Wednesday, November 4, 2009
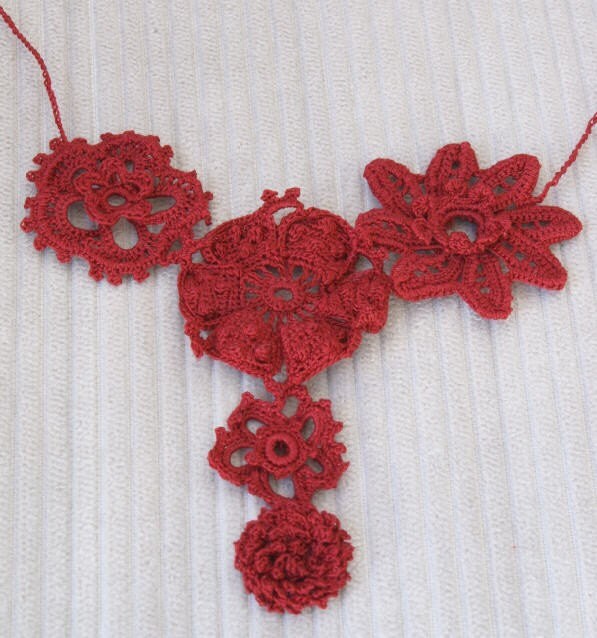
Irish Crochet Necklace - Irish rose design
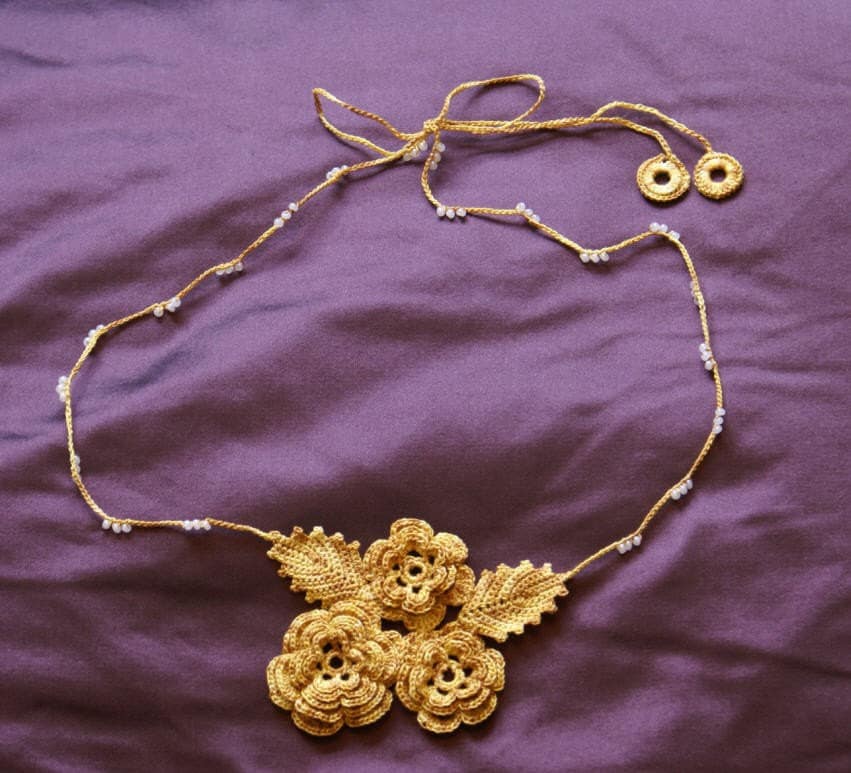
This is one of my favorite necklaces that I have made so far. It is created with 3 Irish roses, one large and 2 smaller. Then 2 Irish Crochet rose leaves are added.
In crocheting the necklace "chain" I added in some gutterman beads in groups of 3 along each chain.
I have added some covered crochet covered washers to the ends of the chain to add weight and make them hang nicely when tied.
There is no specific closure, the chains are tied to close - in that way the necklace lenght can be altered to neck size and also to neckline.
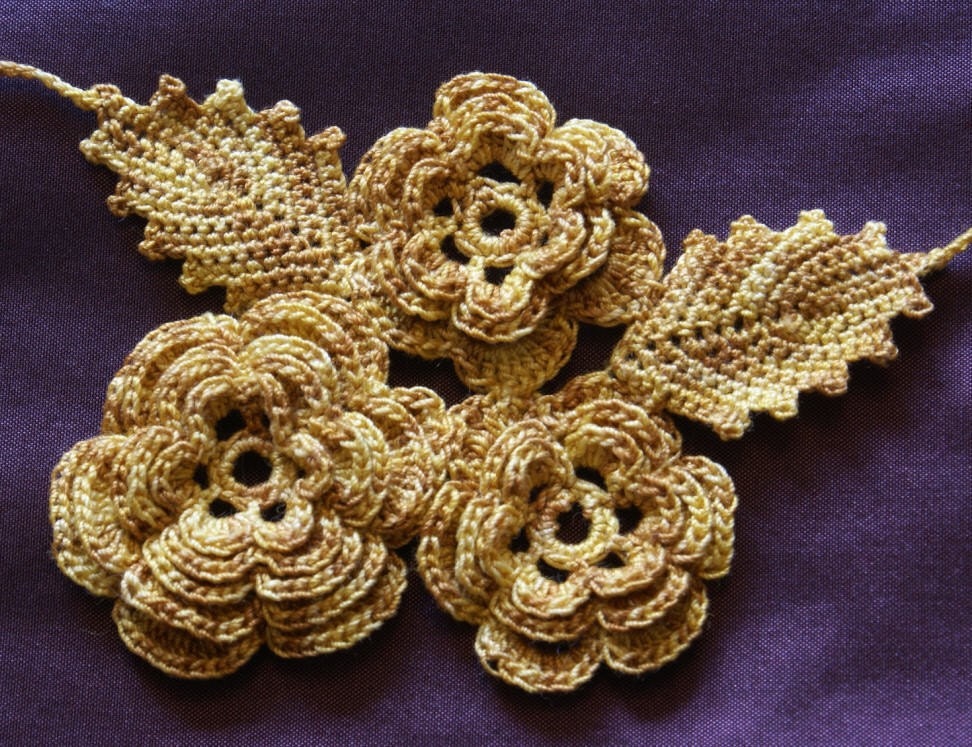
I used no30 multi-coloured crochet thread. I really like the effect that the multi-coloured thread creates.
Tuesday, November 3, 2009
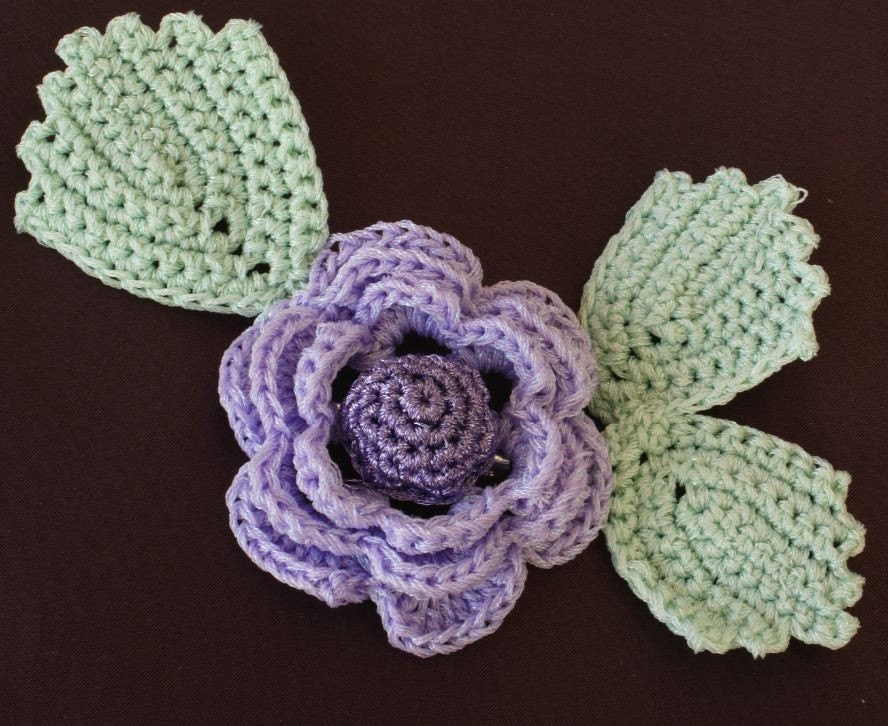
Christmas flower necklace

This flower didn't quite work as expected, but I prefer the way it turned out in the end. It, in theory, should have been much flatter - but I tend to work my crochet quite tight so in the end it became quite 3D.
I prefer the fact the petals stand up from each other it makes the whole flower much more real.
The flower itself reminds me of a poinsettia, which is very much a Christmas flower in the UK (perhaps the rest of the world too??).
The dark red and pink thread also helps with the Christmas theme. Again, this is no 80 crochet thread.
The necklace "chain" is made with crochet over 2 strands of padding cord & I finished off the necklace with an iridescent flower button for the closure.
Monday, November 2, 2009
Christmas Irish Rose Brooch

This is created using No 20 Crochet cotton for the main body of the rose. To make this brooch a Christmas Irish rose I added in DMC Metalic embroidery thread in Gold.
Initially I started creating a standard Irish rose and when I reached the fifth layer of petals I then added in the Gold thread. Then again on the sixth layer of petals I added a final row of Gold.
To finish off the rose I created a center in gold thread as well.
This particular thread is quite difficult to crochet. It tends to split into the individual strands and takes quite a bit of patients to keep the work neat and avoid stray loops.
The thread itself is quite course to work with and it can bite into your fingers when working with it. Fortunately in this particular piece the amount of working with this thread was limited so I managed to avoid too much damage!
I think the effort was worth it in the end, the gold thread catches the light beautifully. I think that it turned out to be a really pretty festive brooch.
Friday, October 30, 2009
Irish Rose crochet brooch
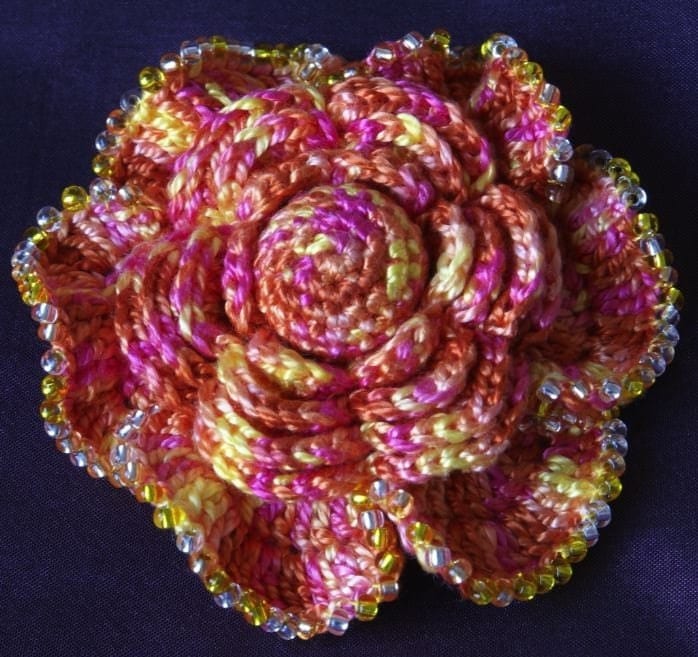
I made this using DMC pearl cotton embroidery thread & Gutermann rocailles 9/o beads (colour 9901).
The thread has a lovely sheen that makes it both a pleasure to work with an creates really pretty work. I like the effect of that the multi coloured thread makes.
Although the beads could have been worked in as I crochet, I forgot to thread them before I started !! So as a result I hand sewed them on afterwards.
To finish of the brooch I crochet a center "bead" to cover the spokes that form the center of a traditional Irish rose.
Wednesday, October 28, 2009
How to make a Clones Knot
This ia a particular Irish crochet "stitch" that is fairly complicated to complete. Traditionally it is created across the chain as shown here


Creating a clones knot will take some practice, it can be a tricky prospect to create one of these.
Sometimes your hook might get stuck while you are trying to pull through all the loops, I find that if you put your thumb onto the loops to pinch them before drawing the hook through it helps to make the hook run smoothly - otherwise a little bit of wiggling sometimes does the trick.
I recommend making a small crochet patch first and then making a row of clones knots on that to practice, the patch gives you something to hold and allows you to get the hang of the stitch before attempting a motif that requires it.
If the text above still leaves you confused then try having a look at this video for the Clones knot. It shows the action required really nicely.

The pattern should say how many chains should be worked before attempting to make the clones knot. It is a difficult stitch to describe in words but I will try ...
The pattern will call for a number of chains to be created for the Clones knot to be created over.
After completing the chain hold it in front of you as if you were about to crochet into the chain
Wrap the yarn round the hook as if you were going to make a treble stitch - you now have 2 loops on the hook.
Sweep the hook under the chain to the other side - away from you
Catch the yarn again (3 loops)
Then sweep the hook under the chain again - towards you
Catch the yarn again (4 loops)
carry on exactly like this until you have the requried number of loops (or overs) on your hook & chain.

You see from the image above that the loops are alternatively wrapping from one side then the other.
When you have the required number of loops (or overs) then draw a loop through all of the loops you have made, then yarn over again and draw through the last loop & pull tight.
Finally make a stitch in the chain at the base of the knot to encircle and close the knot.

Sometimes your hook might get stuck while you are trying to pull through all the loops, I find that if you put your thumb onto the loops to pinch them before drawing the hook through it helps to make the hook run smoothly - otherwise a little bit of wiggling sometimes does the trick.
I recommend making a small crochet patch first and then making a row of clones knots on that to practice, the patch gives you something to hold and allows you to get the hang of the stitch before attempting a motif that requires it.
If the text above still leaves you confused then try having a look at this video for the Clones knot. It shows the action required really nicely.
Irish Crochet Butterfly
I got a bit more adventurous and decided to try to create one of the Irish crochet butterflys
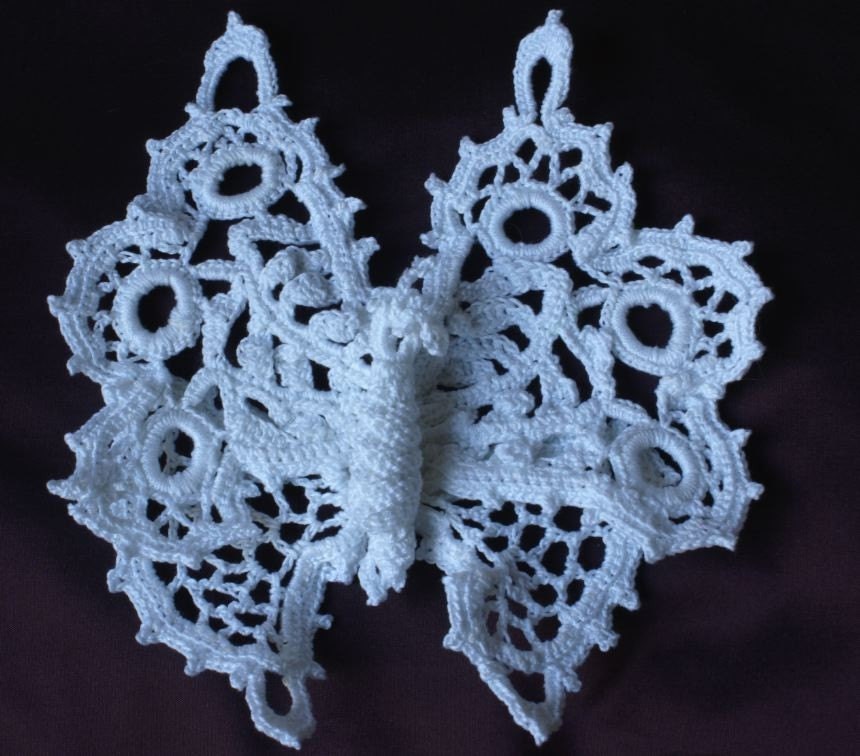
I made it using No 10 thread for the padding cord and No30 thread for the crochet working. It made this butterfly come out at a reasonable size at 13x14 cm.
I find that working with the larger guage thread when tackling a project for the first time makes things a little easier, having said that this particular motif took some time and effort to make.
The pattern called for a "mesh" which I cannot find any useful references to on the internet - it would seem that they must be some sort of circular form to wind the padding cord onto for creating the padded rings etc. I'll keep on searching and see if I find any more information on this.
In making this motif I learned the valuable lesson of keeping the padding cord tight & pulling it up from time to time. Particularly when I was creating the edging that goes around the whole butterfly the padding cord bunched from time to time and it needed to be pulled through to flatten it ... I had to rip back a couple of times when I had gone too far to pull through successfully. Like I said - lesson learned!
Tuesday, October 27, 2009
Irish Crochet Necklace
I created this necklace using No70 crochet thread, it is reasonably fine thread and creates a quite delicate look.
This Irish rose has an additional layer of petals compared to the "Traditional" 6 petal design, I think it gives it a very soft look.
I have also covered the centre of the rose with a little "dome". The centre can be left open showing the cartwheel of spokes making up the flower or covered like this. I think that either look very pretty.
In this necklace tried out creating a vine leaf design, which is the leaf on the left side below and then added the Rose leaf on the right.
The cord is simply a row of crochet on the padding cord and fastened with a little iridescent flower button.
Reading Irish Crochet Patterns
Most of the Irish Crochet patterns I have come across were published in and around 1900. The notation is slightly different to the way modern patterns are written and the phraseology is quite different.
You have to read ahead in these old patterns. They are not linear like modern patterns, quite often there will be an instruction and as you read ahead you will find that it then refers to the stitches you need to make to preceed this instruction ... so save yourself rework and always read ahead to the next obvious row end.
Here is an example taken from a pattern in Priscilla Irish Crochet No 2
"Into last d work 3 t, into next d 3 t, into next d also 3 t, making 9 t in a row. Chain 1, turn; Work 1 d into each of the next 4 t, 3 d into the centre t and 1 d into the next 4 t (always working into the back strand unless otherwise stated); ch 1, turn;"
As you see, the instruction to always work into the back strand comes part way through the narative - where as in modern patterns this instruction would be up front.
You can also see that the pattern is written more as a story than in the more modern row by row way, so it takes a bit more study and reading before you get underway with creating.
The stitch names are also a little different, in some patterns you will see double crochet referred to as "d" and in others "d c", or in some instances as "Plain".
The stitches generally follow the UK notation so you won't see single crochet mentioned.
The translation of UK to US notation is;
Double Crochet = Single Cochet
Half Treble = Half Double
Treble = Double
Double treble = Treble
Trible treble = Double treble
Irish Crochet Padding Cord
Quite often Irish Crochet is created using 2 different thicknesses of thread, one for making the main body of the work & a second thicker thread for "padding". Alternatively the Padding cord can be created by using multiple strands of the working thread.


In the old patterns this thicker thread is often simply denoted by "PC" which stands for "Padding Cord".
The use of the padding cord gives the Irish crochet its distinctive 3D look.

It can be quite fiddly to work with a padding cord at first, and you have to be careful to keep it out of the way of your working thread - otherwise you can spend as much time undoing knots as working on your crochet !!
Remember that no matter how careful or delicate you are with creating your crochet the padding cord will show through in places, so where a thicker thread is required for the padding cord get one that matches the colour of your working thread. Where it isn't possible to get a thicker thread of a matching colour its best to just make up your padding cord with multiple strands of your working thread.
Irish Crochet
Irish crochet is my latest adventure. It is made with very fine thread, not much thicker than standard sewing cotton & creates such delicate, intricate work. I have to admire the ladies who created Irish crochet back in the days before electric lighting, it can be quite a strain on the eyes even with the best of light.

This is one of my creations, its made with No 30 crochet thread - so not the finest by any means. This is the classic Irish rose with rose leaves, its one of the most popular Irish crochet motifs.
A typical & traditional use of Irish crochet is to create garments and garment fragments such as colars or cuffs. Looking through some of the old pattern books I confess that I wouldn't have the patients to create some of the work that they show ... but the detail & workmanship is amazing.

This image is from Priscilla Irish Crochet Book No1, originally published in 1912. I cannot imagine the patients required to create something like this - that's why I stick to smaller pieces like jewellery & motifs.
I am always fearful that I would ruin a well made motif by trying to incorporate it into a larger item ... perhaps as I get more confident with creating Irish crochet I may become more adventurous.
Introducing Walnut Baby
Walnut baby is my outlet for my handmade crochet (and some knitted) items.
I love making things, creating something has a real satisfaction. The downside of the satisfaction is that my house is rapidly filling up with my creations .... So that I can justify carrying on with my creative passtime I have opened an on-line shop (http://www.walnutbaby.com/), it allows me to clear some space & to make a little money to cover the costs of my yarn habit!!
I love making things, creating something has a real satisfaction. The downside of the satisfaction is that my house is rapidly filling up with my creations .... So that I can justify carrying on with my creative passtime I have opened an on-line shop (http://www.walnutbaby.com/), it allows me to clear some space & to make a little money to cover the costs of my yarn habit!!
Subscribe to:
Posts (Atom)